git: adding remotes
2019-10-23
|~3 min read
|575 words
When you pull a repository down (i.e. clone it) from a remote (like Github, Gitlab, or a private host), git will automatically add it as a remote.
This is how git pull, git push, etc. are used to keep the repositories in sync.
What happens, then, when you need a second remote? This is a fairly common situation actually, particularly in open source development.
Imagine the following common situation:
- You find a great open source library
- You notice that there’s something you’d like to see added
- You fork the project
- You pull it down locally, and you make the changes
- Now, you’re ready create a pull request, but the original master has changed, and you have conflicts.
What do you do?
Because you created a fork, when you cloned the repo, the remote points to your fork fork, not the original repo. That’s normally a good thing since it means that you push changes up to your repo, not the original one. After all, you forked it. Divergences are to be expected. But now you want to propose changes and you can’t!
The answer is simple: add a second remote repo! That will allow you to pull the changes that are now creating conflicts and handle them locally. (There’s no limit to how many remotes you can have, though it probably makes sense to limit them to forks of the same project.)
Confirm Your Remotes
Before you add a new remote repository, let’s confirm the current remotes:
$ git remote -v
origin https://github.com/myUser/example.git (fetch)
origin https://github.com/myUser/example.git (push)
Add A Remote
Adding a remote is straightforward:
git remote add upstream https://github.com/*ORIGINAL_OWNER*/*ORIGINAL_REPOSITORY*.gitA few notes:
- There’s nothing special about “upstream” - this could be called whatever you want. So, if you did
git remote add ridiculous …when you do a pull later, you would do it withgit pull ridiculous master - The URL (
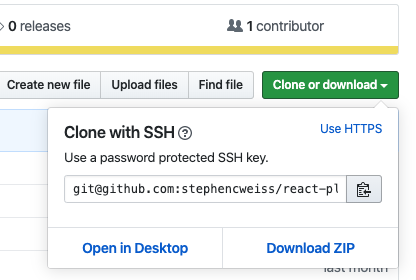
.git) can be found in the “Clone or download” button on Github. You can use either SSH or HTTPS
Verify Your Remote(s)
After setting the remote, you can make sure that it set properly:
$ git remote -v
origin https://github.com/myUser/example.git (fetch)
origin https://github.com/myUser/example.git (push)
upstream https://github.com/someoneElse/example.git (fetch)
upstream https://github.com/someoneElse/example.git (push)
In this situation you have two remotes -
- One for myUser which you can interact with through the reference alias of
origin - One for the original project’s repo, which you’ve named
upstream
Pulling Upstream Master
Now that you have another remote repository, you can pull down the latest in the same way that you’d pull origin, except that you need to specify it because origin is the default, and upstream (or ridiculous) is not.
git pull upstream master(In our case, this means that you could now handle the conflicts locally and then push up a resolved branch for review.)
Pulling Upstream Branches Other Than Master
What if, instead of changes to master that were creating conflicts, you actually noticed another branch that you wanted to incorporate? That is, you noticed someone else was working on a branch that had not been merged into the upstream master (yet). (Let’s call that the target branch).
How would you pull that branch down? Well, you’ve already set up the remote, so now you just need to pull down a remote branch.
Footnotes
Related Posts
Hi there and thanks for reading! My name's Stephen. I live in Chicago with my wife, Kate, and dog, Finn. Want more? See about and get in touch!