 /* Code Comments */
vs code: adding ligatures to a font that doesn't have them
2018-12-29
|~5 min read
|911 words
A few months ago, I found a font, fira code that introduced me to ligatures and how they could be useful in writing code.
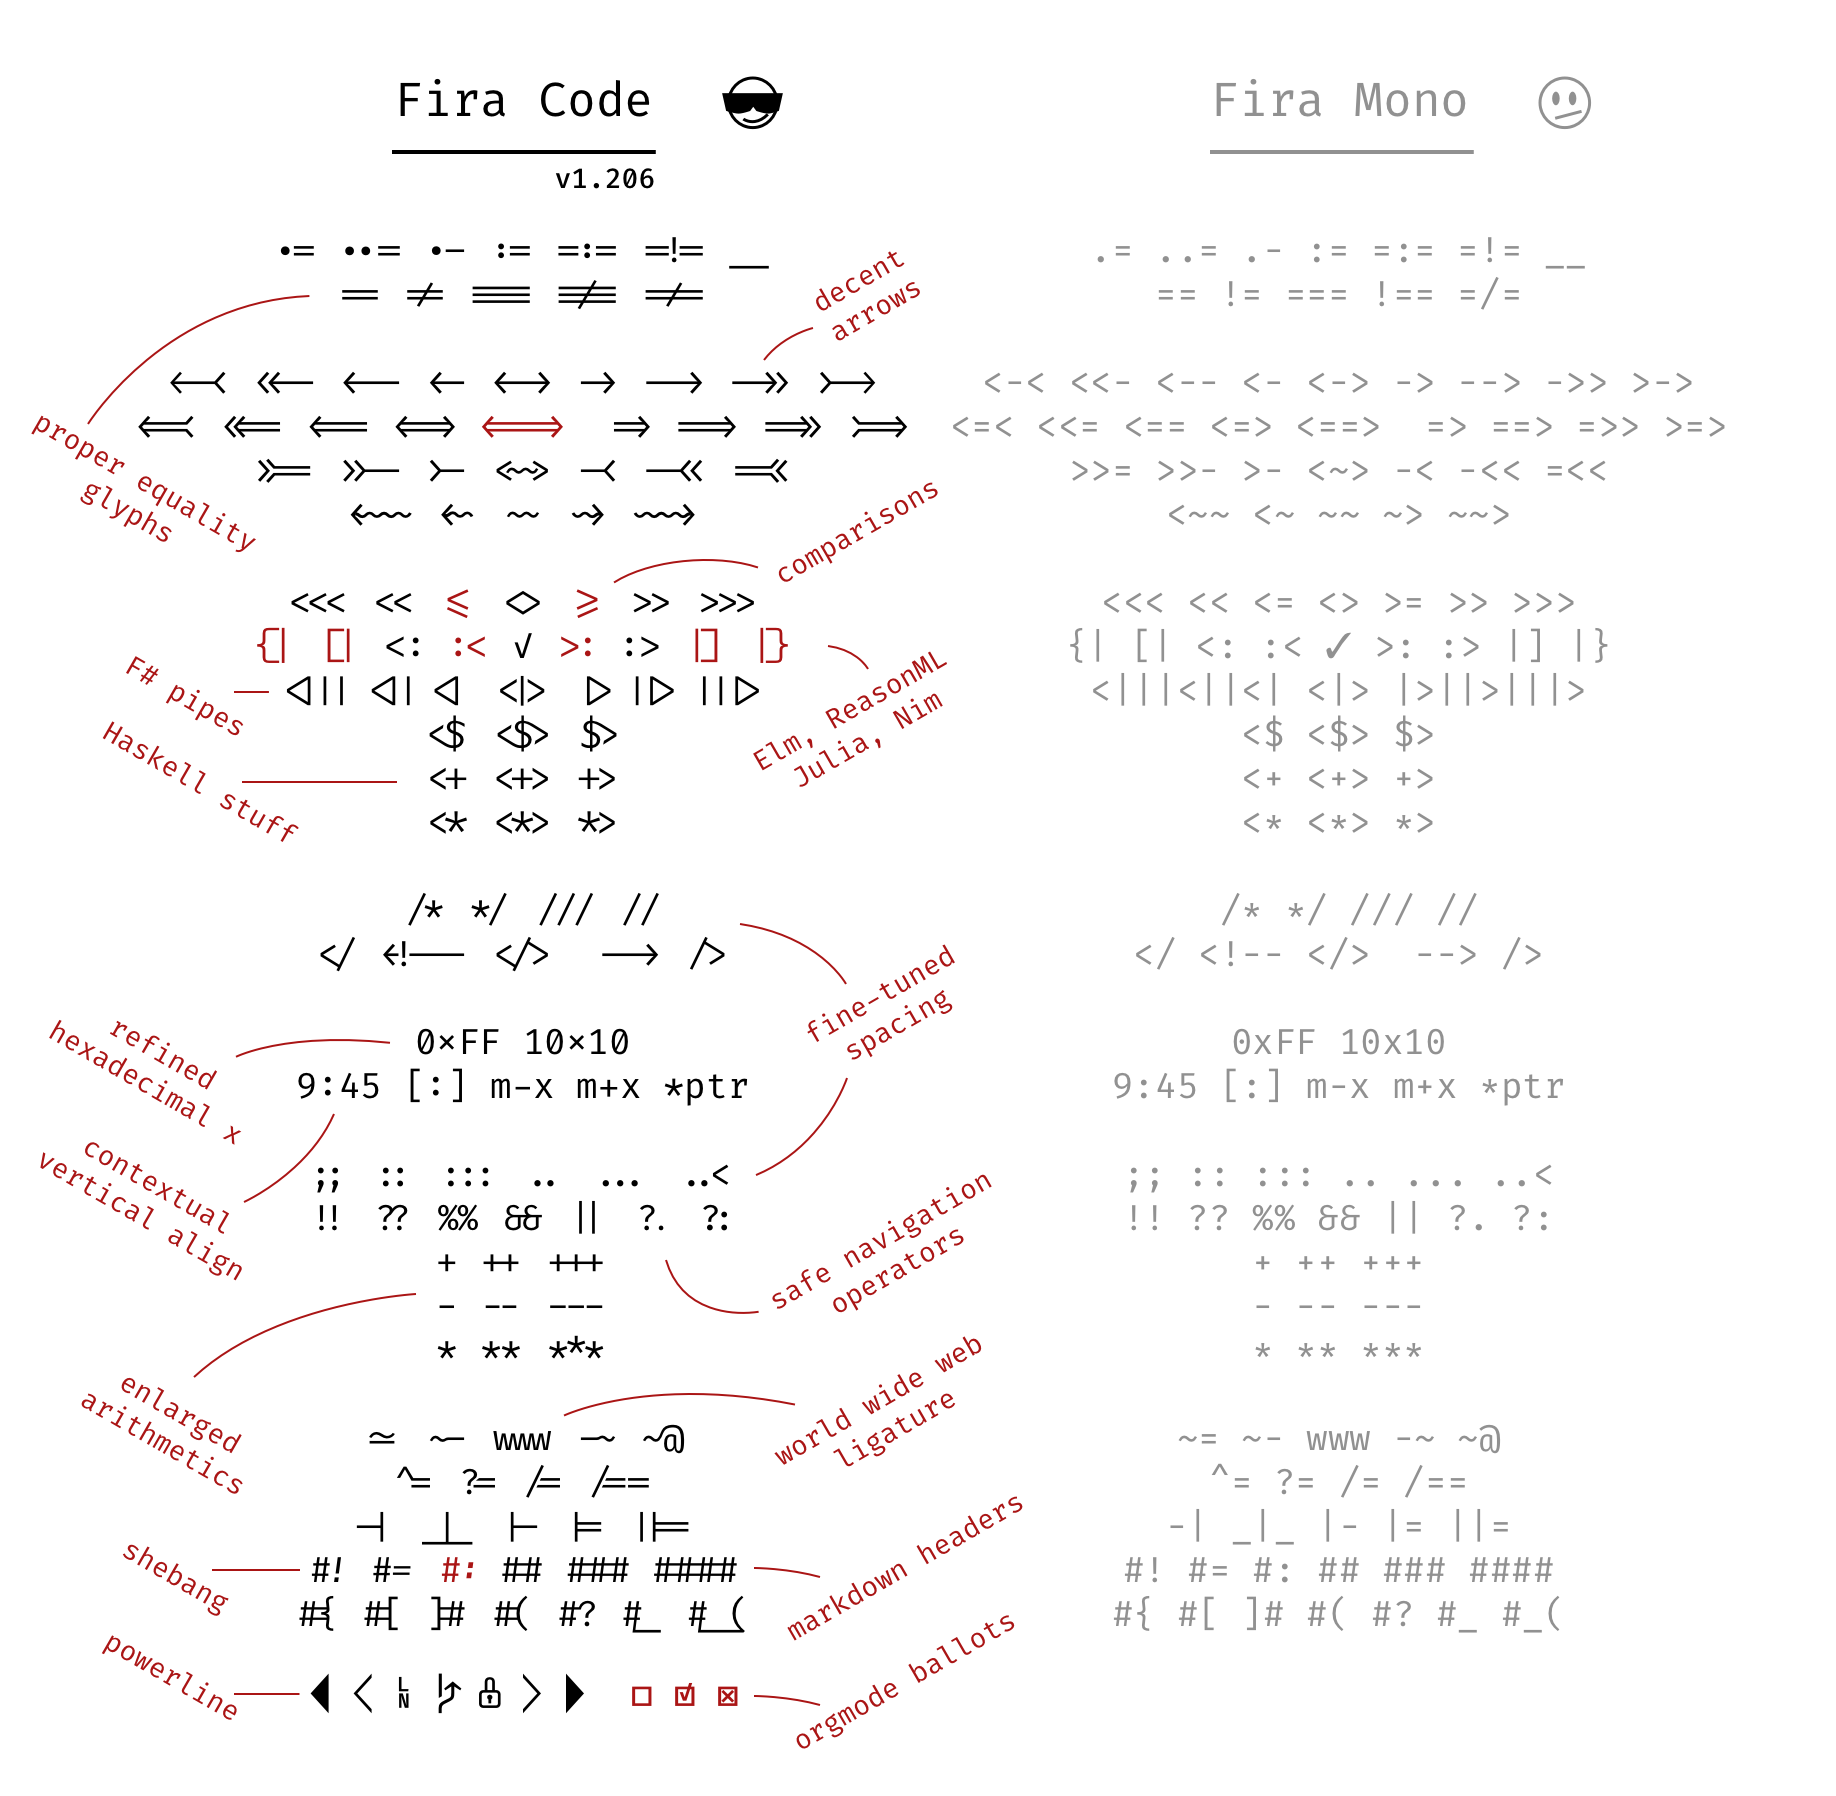 |
|---|
| Fira Code’s ligature set |
Fira code is awesome and honestly, I was really happy with it. But, I got greedy and wanted to combine it with a font that included cursive so that I could combine the two.
If you’ve ever watched a Wes Bos video, you’ve likely seen Operator Mono. It’s a beautiful font. But, it doesn’t have ligatures. So, even if I wanted to use it, I’d be frustrated.
Google searches on using ligatures and cursive fonts will yield multiple results - such as this article by Mohammed Zama Khan.
Mohammed’s solution, however, was to use two fonts - Fira Code and Fira Flott and then reference a custom CSS file within his VS Code settings.json. His settings appear to make Fira Code the default, and then inject Fira Flott in specific situations.
This works (he proved it and I tested it), but I wanted to go the other way and have a default cursive font, and add ligatures to it.
My search ended up sending me to the Ligaturizer, a tool built in python to add ligatures to any font.
Ligatures: What Are They And Why Do They Matter?
Before we get into how to use Ligaturizer (spoiler alert: the Readme is incredibly helpful), let’s talk about why.
Ligatures are symbols that appear when two (or more) characters appear in sequence that is different than how those characters would appear if printed independently.
 |
|---|
| Wikipedia Source |
As an example, this example from Wikipedia shows how the Th and Wh combine in unique ways when next to one another.
Ligatures draw your attention to specific parts of text because they’re different. This can aid in readability. In the case of The wheel above, the ligatures provide a more fluid experience.
Using ligatures in writing code can provide a similar benefit. Taking a Javascript example, imagine that you want to evaluate for strict equivalence instead of loose equivalence.
When you have hundreds of lines of code, ensuring you wrote === and not == is harder than seeing the difference between a long three bars and a short two bars.
Ligatures visually inform intent.
Running Ligaturizer
Once you download Ligaturizer and open it up, you’ll notice that there are several fonts already present for you to test.
Configuring Ligaturizer
The first thing to do is add the fonts you want to the fonts directory.
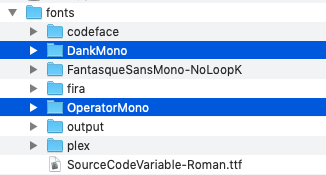
In my case, I’m adding both DankMono and OperatorMono.
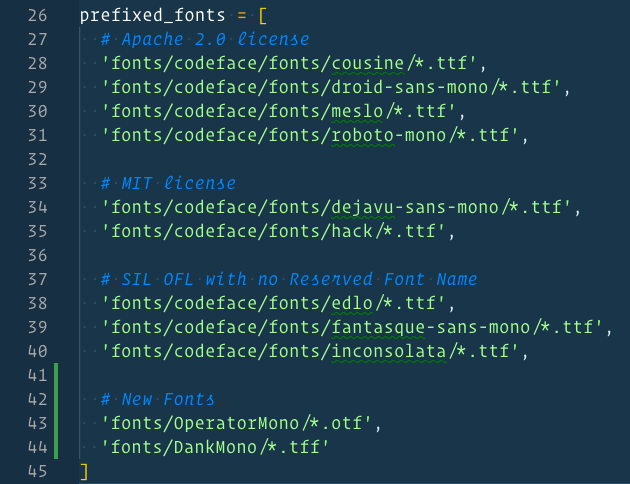
Once that’s done, open up .build.py in your text editor and add the new fonts. Before running make, I ended up commenting out rows 27-40, however, it’s not strictly necessary.
Optionally, at this point, you can go into the ligatures.py file and disable any of the ligatures you do not want added to the fonts.
Ligaturizer comes with ~600 different ligatures, so there’s plenty of customization available. I took a cursory look and decided to stick with the defaults.
Make Your Fonts
Now, you’re ready to run the program and make your fonts.
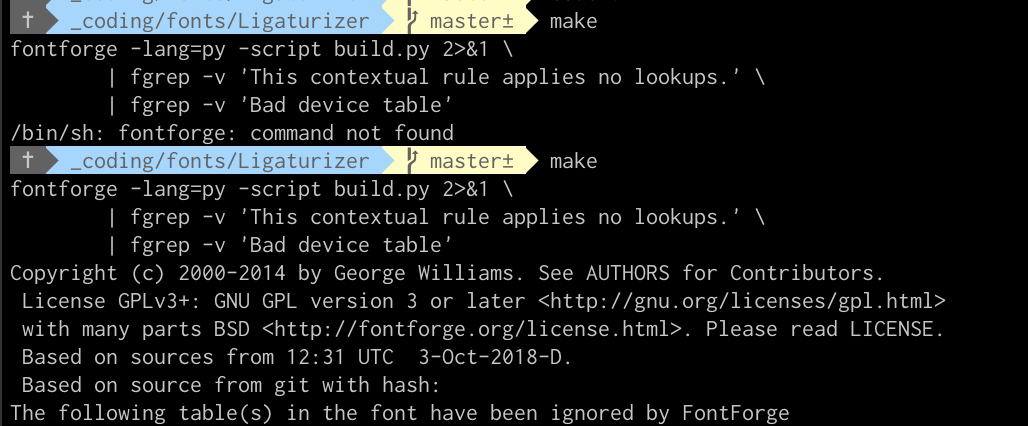
Ligaturizer requires python and fontforge. (If you don’t have it, look at the Readme to see how to get it. On Mac it’s as easy as brew install fontforge).
Add Font to FontBook
Assuming you follow the instructions, however, after the application runs, you’ll have a suite of new font files in your output directory.
At this point, you have a new font that you can use just like any other. If you’re on a Mac, that means you can import the files into your Font Book and then reference them in your VS Code settings.
My VS Code Settings
Note: When I did this, though my files had a prefix, when I loaded them into FontBook, they were folded into the same font family. To address this, I ended up removing the whole font family and then reimporting just the ligatur-ized files.
Now that I have a font that has both cursive (for italics) and ligatures, I needed to configure VS Code appropriately.
Here are the custom settings I’ve added to get the effects I was looking for.
{
  "editor.fontFamily": "'Operator Mono', Menlo, Monaco, 'Courier New', monospace",
  "editor.fontLigatures": true,
  "editor.tokenColorCustomizations": {
    "textMateRules": [
      {
        "scope": [
          // following will use italics
          "comment",
          "entity.name.type.class", //class names
          "entity.name.type.js", // new … Expression
          "constant", //String, Number, Boolean…, this, super
          "keyword", //import, export, return…
          "support.class.builtin.js", //String, Number, Boolean…, this, super
          "storage.modifier", //static keyword
          "storage.type.class.js", //class keyword
          "storage.modifier", //static keyword
          "storage.type.class.js", //class keyword
          "storage.type.function.js", // function keyword
          "storage.type.js", // Variable declarations
          "keyword.control.import.js", // Imports
          "keyword.control.from.js", // From-Keyword
          "keyword.control.flow.js", // await
          "keyword.control.conditional.js", // if
          "keyword.control.loop.js", // for
          "keyword.operator.new.js", // new
        ],
        "settings": {
          "fontStyle": "italic"
        }
      },
      {
        "scope": [
          //following will be excluded from italics (VS Code has some defaults for italics)
          "invalid",
          "keyword.operator",
          "constant.numeric.css",
          "keyword.other.unit.px.css",
          "constant.numeric.decimal.js",
          "constant.numeric.json",
          "constant.numeric.css",
        ],
        "settings": {
          "fontStyle": ""
        }
      }
    ]
  }
Sources
For more information, start here:
- MS: Syntax Highlighting Optimizations
- StackOverflow: Display italics in formatted code
- Custom Style Sheet with Fira Code and Fira Flott
- Reddit: Combining Fonts in VS Code
- Wikipedia: Ligatures
Resources
- Coding With Character | Doug Wilson - Includes a list of other fonts to consider.
Tools
Hi there and thanks for reading! My name's Stephen. I live in Chicago with my wife, Kate, and dog, Finn. Want more? See about and get in touch!